We’ve all learned a lot during the last year. As someone who is new to the world of brewing beer, I can say I’ve learned recipe development is something that you get out what you put in. Taking the time to research malt, yeast, and hops, along with understanding what your ingredients are doing throughout the brewing process, will enable you to make a beer that tastes the way you want it to.
Due to Covid and the restrictions in place for the last year, I found that going out to my favorite restaurant or BBQ place was difficult. So I thought “Why not do BBQ myself?!” I have always enjoyed barbequing but have never really taken the time to understand the science of what is going on with meat as it cooks.
Learning to barbecue is a lot like learning to brew beer
Like brewing beer, ingredients and chemistry are important. Having the ability to correctly monitor temperature while barbequing is as important as when mashing in a brew. Understanding what is happening at certain temperatures is essential.
Trial and Error
There are many ways to evaluate ingredients when deciding what to use for the beer style you’re making, including chewing the malt, hot steeps on malts and hops, and brewing trials. The same can be said for barbequing. Tasting and smelling your ingredients prior to using them can greatly increase the chances that you end up with the flavors you want. But, like brewing, the process of cooking could very well change the flavor and aroma of your ingredients, so it never hurts to trial your ingredients before using. For barbecue, I like to use cheaper cuts of meat like chicken breasts, hamburgers, or pork patties to test my spices. Once you apply your spices there is no turning back. I would rather have a few burgers I really do not like compared to a $30-40 cut of meat.
Enjoying what I’ve learned
I enjoy the science of brewing and the science of barbecue. I also enjoy the finished products together. Below are my favorite barbecue and beer recipes for you to enjoy. Now that we can gather again, I am looking forward to sharing these with family and friends!
My Favorite Recipes
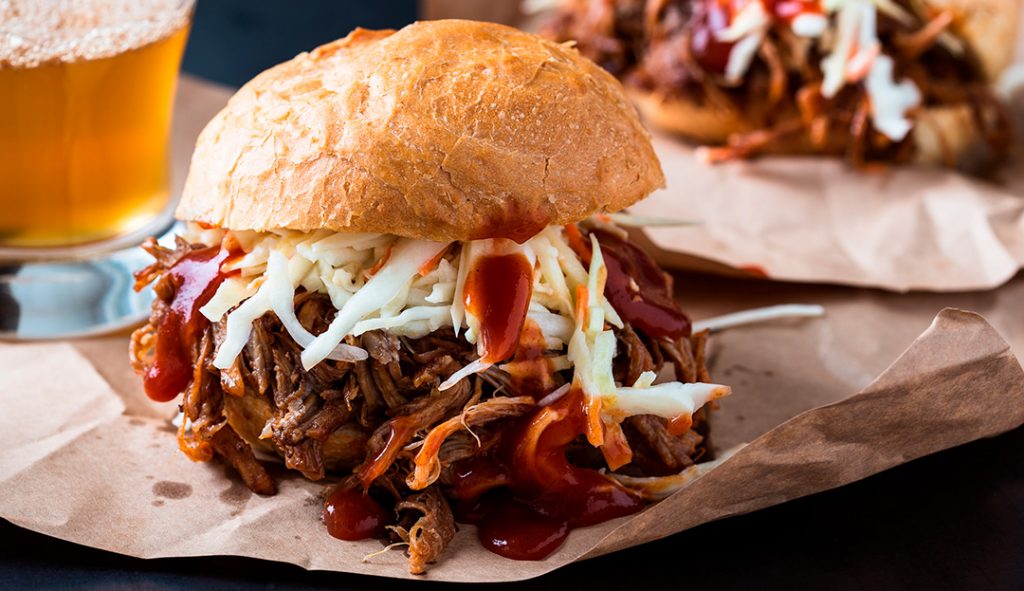
Barbecue Pulled Pork
Ingredients
- 8lb pork shoulder
- Olive oil
- 6T salted butter
- 6 cups apple juice
- ½ cup brown sugar
Dry Rub
- ¼ cup brown sugar
- 2T fresh ground black pepper
- 2T smoked kosher salt
- 1T smoked paprika
- 1T garlic powder
- 1T dried minced onion
- 1T cayenne pepper
- 1t chili powder
Instructions
- Preheat grill to 225°F.
- Place all your dry rub seasonings in a small bowl and mix.
- Place your pork shoulder on a baking sheet and rub the entire shoulder down with olive oil.
- Generously sprinkle the seasonings over it and rub them in (every inch of the shoulder should be covered). There’s no better tool for this than your hands.
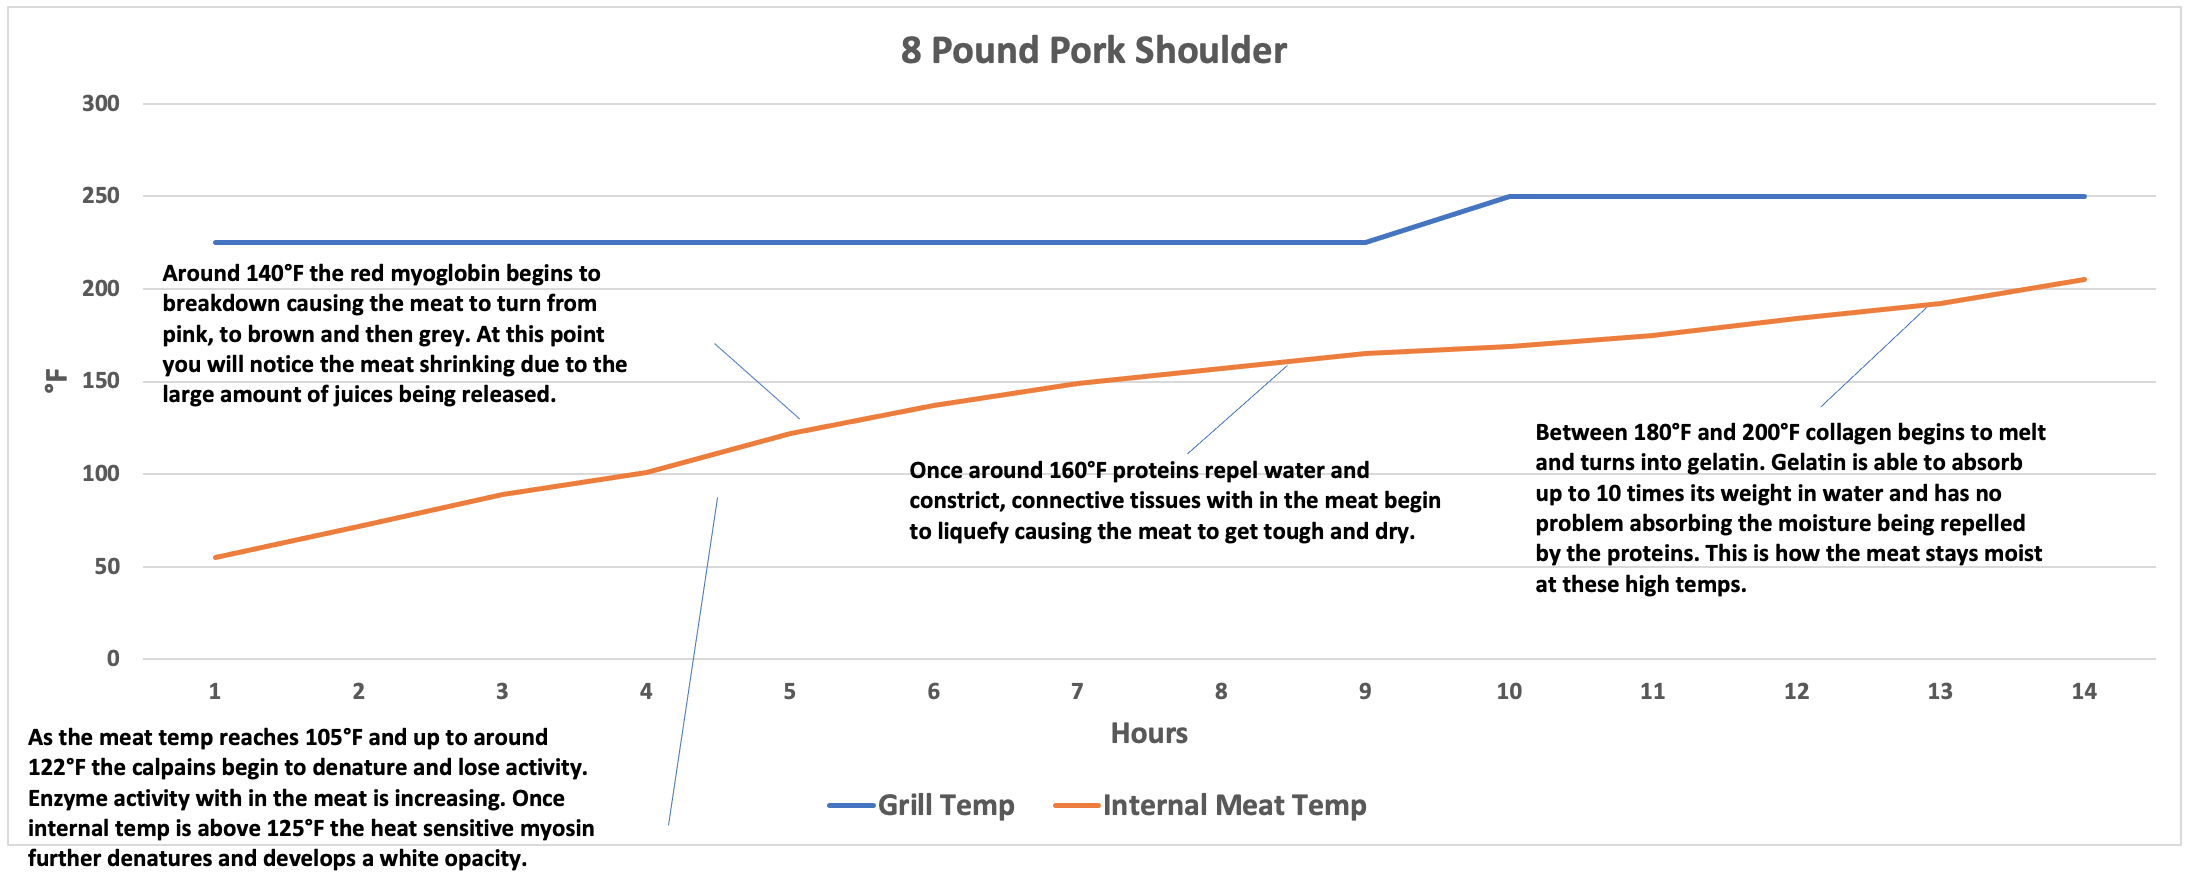
- Place pork shoulder on the grate and close the lid. Keep smoker temperature at 225°F until internal meat temperature reaches 165°F.
- Remove pork shoulder from grill and put into a disposable aluminum pan with apple juice, butter, and brown sugar.
- Cover pan with aluminum foil put back onto grill and set grill to 250°F.
- Remove pork shoulder from grill when internal temperature of meat reaches around 200°F.
- Remove from pan, wrap in aluminum foil, parchment paper, and a towel; put in a cooler and rest 1 hour.
- After one hour, unwrap and shred.
Because of texture, flavor, and versatility, one of my favorite cuts of meat is a bone-in pork shoulder.
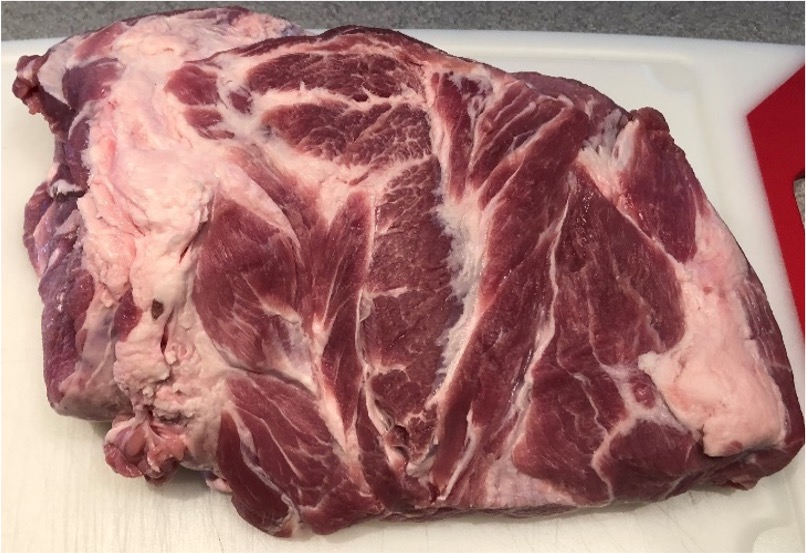
Pork shoulders I prefer are around 8 lbs. and have a good amount of marbling. After trimming I like to have around ¼ inch of fat on the thickest parts.
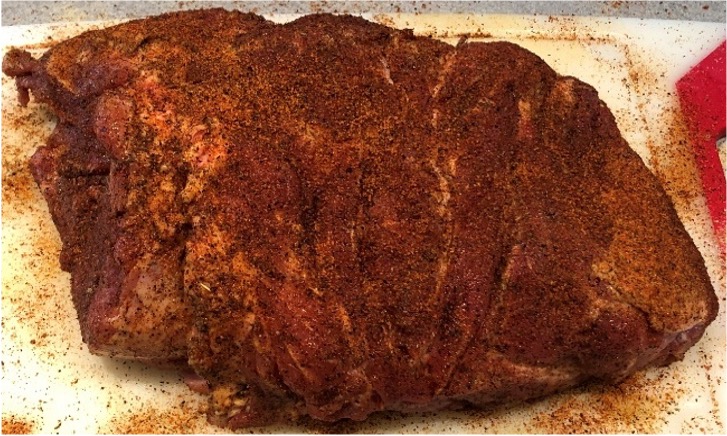
In my experience, a very generous coating of rub works best when cooking large cuts of meat.
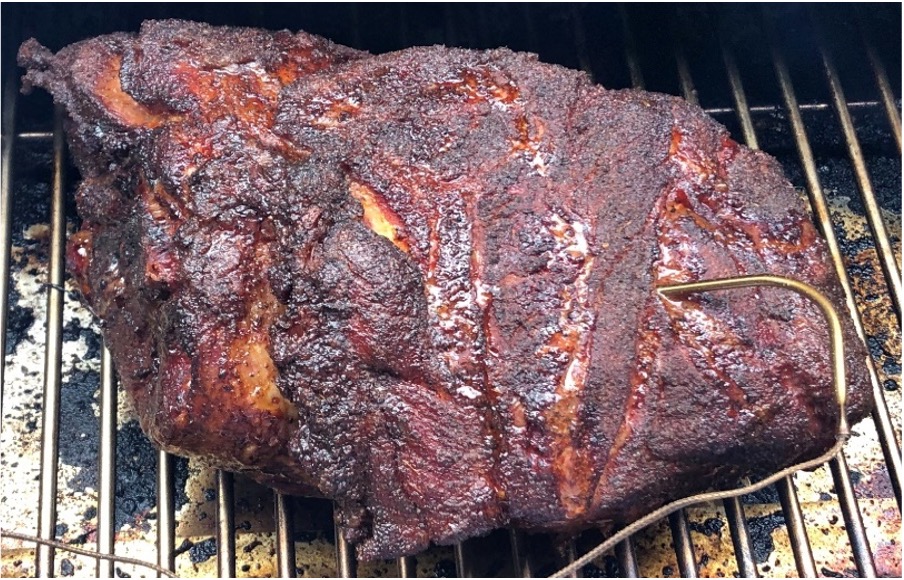
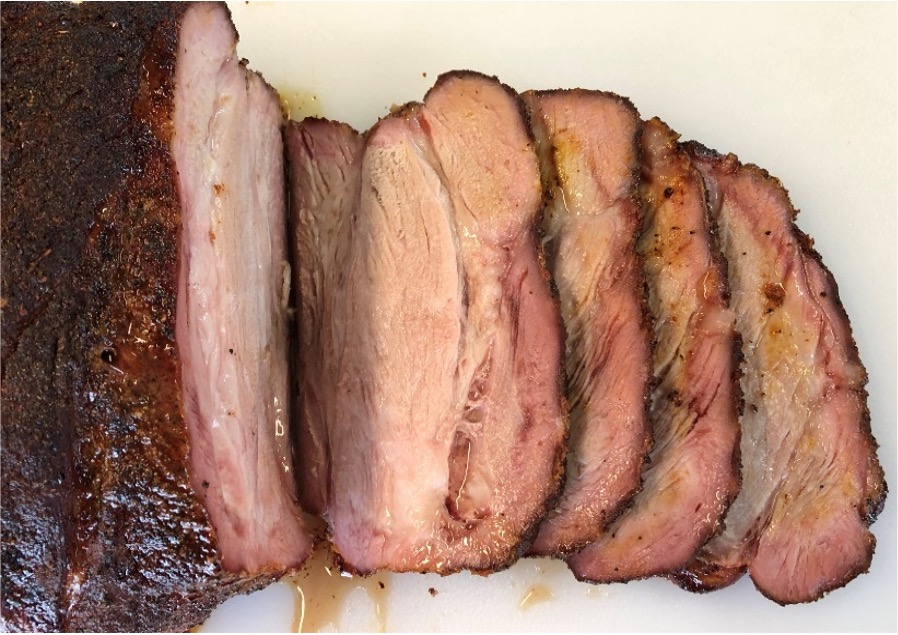
After around 8 hours of cooking at 225°F, the pork shoulder has reached an internal temperature of 165°F and has developed a dark brown to black bark. At this point, the pork shoulder is ready to eat as sliced pork. One of the reasons pork shoulders are a favorite is versatility. My goal is usually pulled pork.
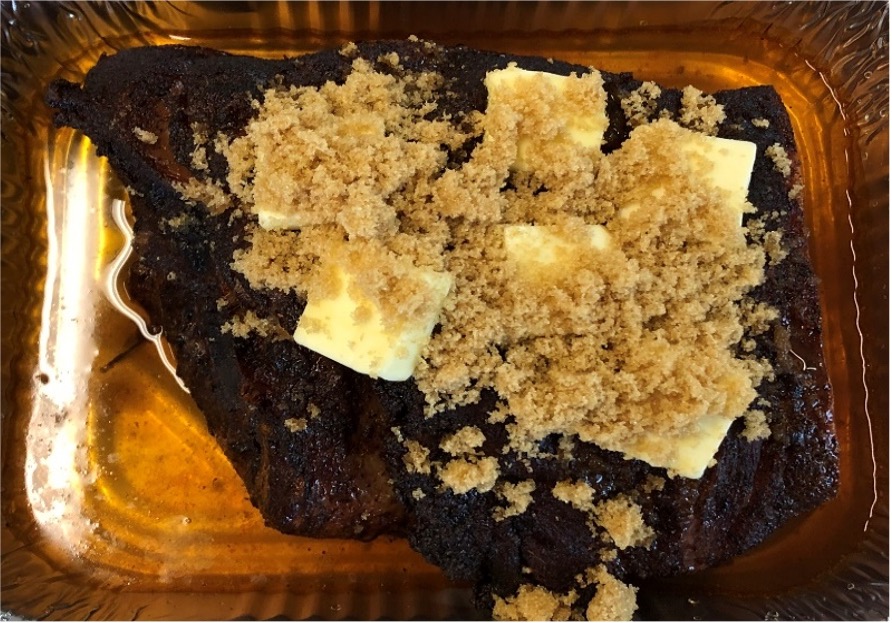
Because slicing the meat removes the bark, it is not ideal if you are planning on further cooking the meat. In this instance, it was just about lunchtime, and I planned on braising with apple juice, brown sugar, and butter anyway. After braising at 250°F for 6 more hours the internal temperature reached 200°F and the meat was ready to be taken off the grill, wrapped in parchment paper and a towel, put in a cooler, and rested for an hour.
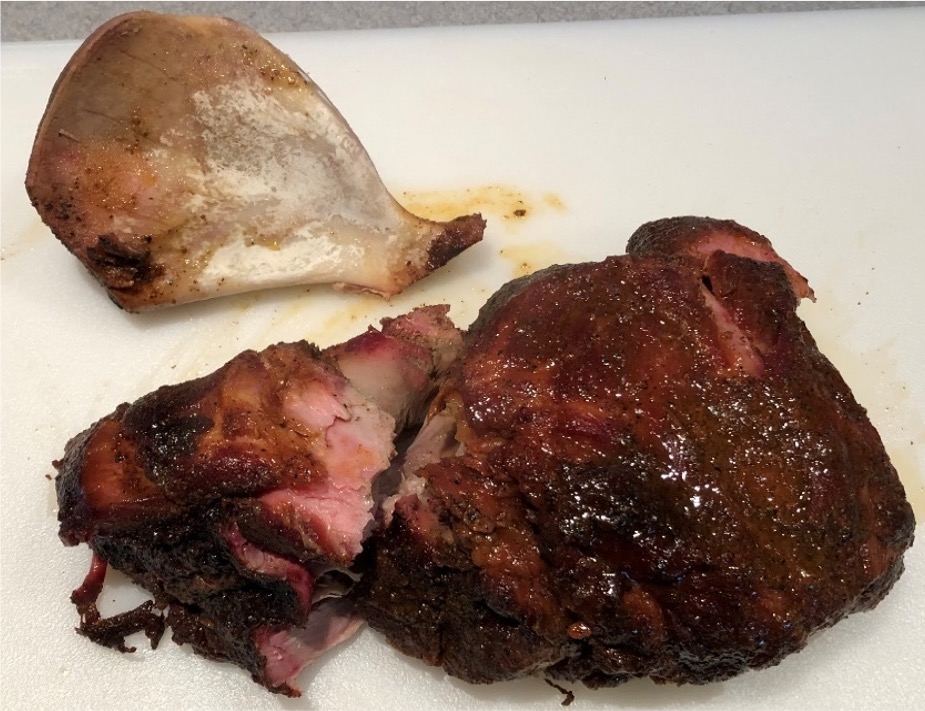
I knew everything went well because the blade bone came out with minimal effort.
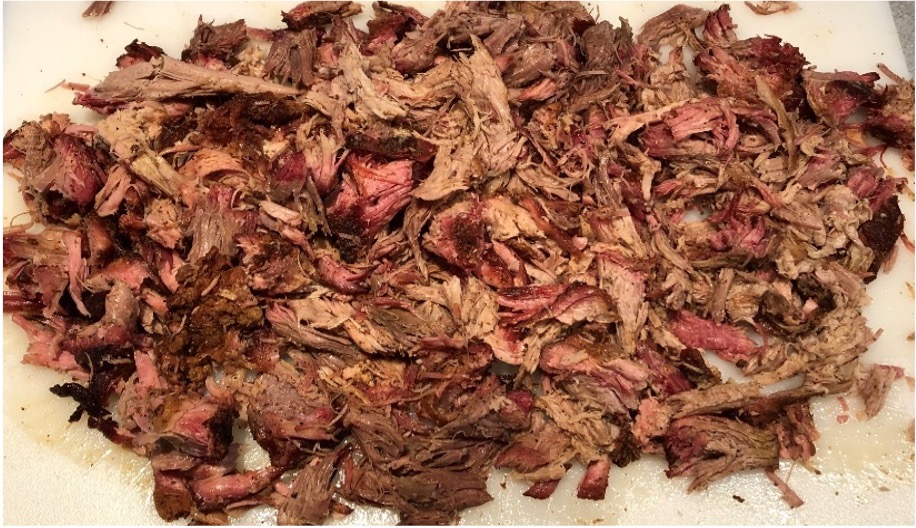
Once shredded, there are many ways to enjoy pork shoulder. Most of this meat was used for one of my favorites – pulled pork tacos.
Smoky Skies Hazy IPA Recipe
This beer pairs very well with my pulled pork recipe above.
Smoky Skies Hazy IPA (30 gal)
Grain
- Briess Synergy Select Pilsen MaltGems® – 50#
- Briess Brewers Oat Flakes – 7#
- Briess Wheat Malt, White – 7#
Hops
- Cryo Citra – 6.5oz (185g)
- Cryo Mosaic – 6.5oz (185g)
Yeast
- Wyeast London Ale III
- Heat 18 gals of 50% tap water and 50% deionized/distilled water to 125°F; mash in.
- Ramp up to 144°F, hold for 30 min.
- Ramp up to 157°F, hold for 30 min.
- Mash off at 170°F. Transfer to lauter, sparge with 170°F deionized/distilled water.
- Boil for 60 min.
- Whirlpool until temp reaches 180°F; add whirlpool hops (85g of Citra and Mosaic). Rest for 10 min. and then transfer.
- Cool wort to 70°F.
- Fermentation temp 64-74°F.
- Add first dry hop (50g of Citra and Mosaic) to actively fermenting beer.
- First dry hop 18-24 hours from beginning of fermentation (24hr Dry Hop).
- Add second dry hop (50g of Citra and Mosaic) 1 Plato from Finished Gravity (24hr Dry Hop). After reaching Finished Gravity allow 5-7 days at 45°F before bottling.
- Carbonate to 2.9 volumes CO2.